
The possibility to create Word documents based upon a template and the data from the application gives the user an easy way to define documents to generate.
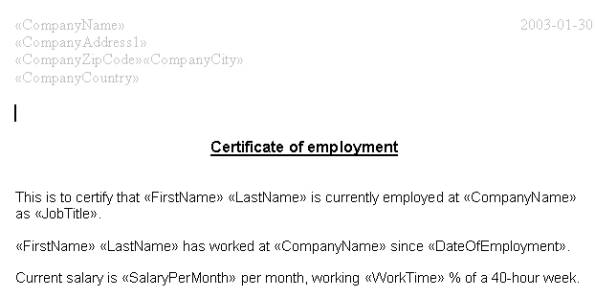
The available information that may be used in the document consists of a fixed number of fields that can be mixed with the text in the documents. There are 51 items defined and supplied in an employeedata.htm file that comes with the application. The file currently includes the following database items:
Company Information
Company Name, Association No, Company Address (all fields due to the company address presentation set up), Company Address1, Company Address2, Company Zip Code, Company City, Company State, Company County, Company Country, Company Phone, Company Fax, Company Email
Employees Personal Information
First Name, Last Name, Address, Address1, Address2, Zip Code, City, State, County, Country, Gender, Date of Birth, Place of Birth
Employment Related Information
Emp No, Date of Employment, Date of Leaving, Employment Comments, Work Time, Leaving Cause, Date Start Position, Date End Position, Position Title, Job Title, Manager Name, Manager Job Title, Salary per Year, Salary per Month, Salary per Hour, Salary Amount, Salary Period, Salary Pay Frequency, Salary Currency Code
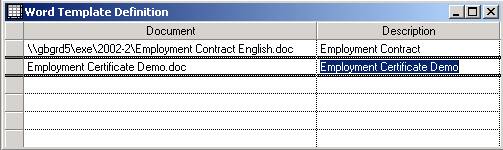
The basic data is set up in the window Word Template Definition located in the folder Employees and Organizational Definitions/ Misc. Access and Set-Up Windows. In this window the document name including the search path is entered together with a description. The template itself must of course be named and placed in the correct folder
Below is an example of a document template.
In order to generate this document for a specific employee you:
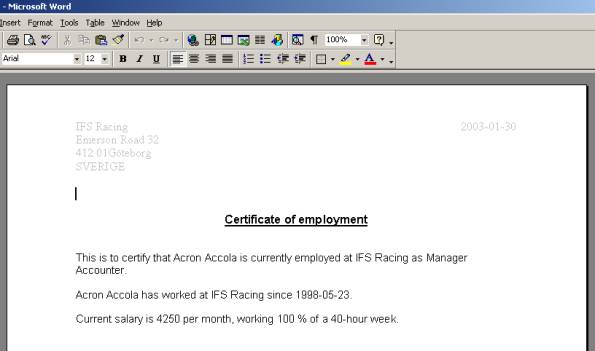
The result is a MS Word document.
To create a new document template the user needs to do the following:
We will show all these steps in the sections below.
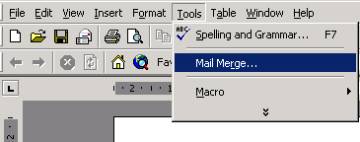
Start Microsoft Word and create a new blank Word document. Go to Tools/ Mail Merge.
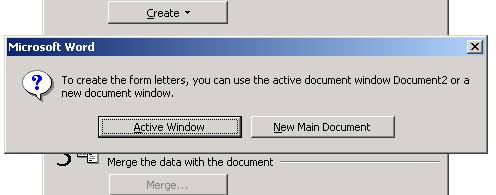
Choose to Create Form Letters.
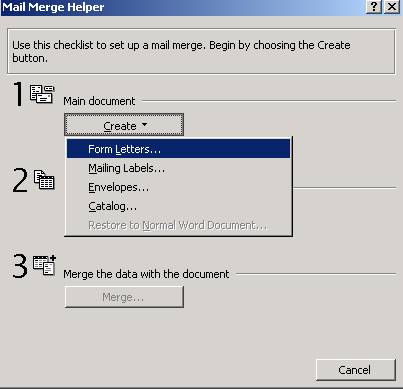
and choose Active Window in the dialog.
For data source choose to Open Data Source.
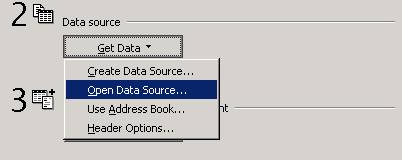
Browse to employeedata.htm and select that file, answer yes on the next question to Edit Main Document.
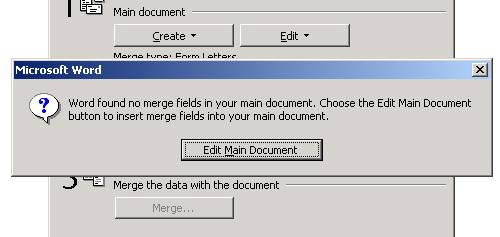
In the upper left corner of the document the alternative Insert Merge Field appears.
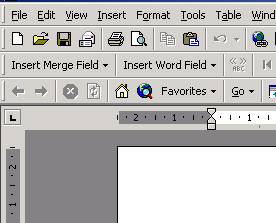
All the data that may be fetched from the application is available in this list.
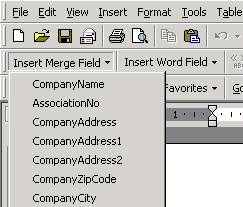
By choosing from these fields and adding text the template is constructed.

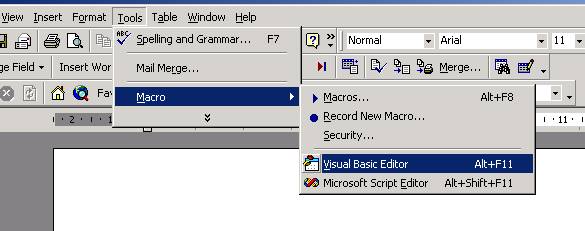
To add a Visual Basic Macro go to Tools/Macro/Visual Basic Editor.
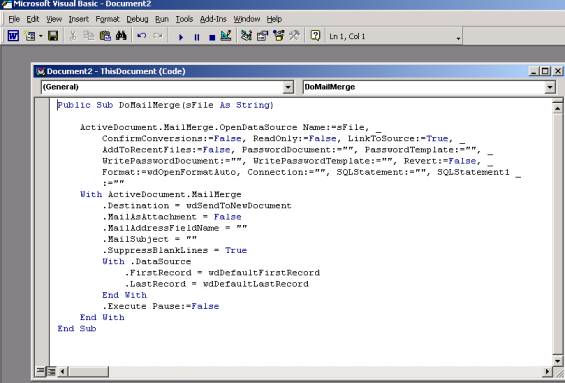
Add the following code (just copy the code and paste it in the code window):
Public Sub DoMailMerge(sFile As String)
    ActiveDocument.MailMerge.OpenDataSource Name:=sFile, _
        ConfirmConversions:=False, ReadOnly:=False, LinkToSource:=True, _
        AddToRecentFiles:=False, PasswordDocument:="", PasswordTemplate:="", _
        WritePasswordDocument:="", WritePasswordTemplate:="", Revert:=False, _
        Format:=wdOpenFormatAuto, Connection:="", SQLStatement:="", SQLStatement1 _
        :=""
    With ActiveDocument.MailMerge
        .Destination = wdSendToNewDocument
        .MailAsAttachment = False
        .MailAddressFieldName = ""
        .MailSubject = ""
        .SuppressBlankLines = True
        With .DataSource
            .FirstRecord = wdDefaultFirstRecord
            .LastRecord = wdDefaultLastRecord
        End With
        .Execute Pause:=False
    End With
End Sub
As in the example below:
Finally the document should be saved under an understandable name.
In the example above the document is put in the same folder as the exe file. The document can now be used from the right mouse button dialog in the Employee Files window.