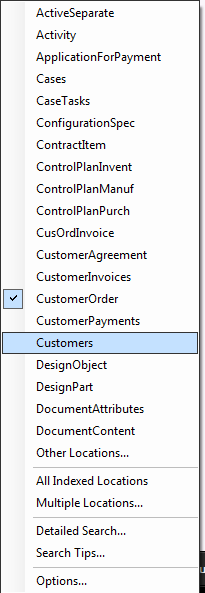
Figure 1: The drop-down menu showing selected indexed locations
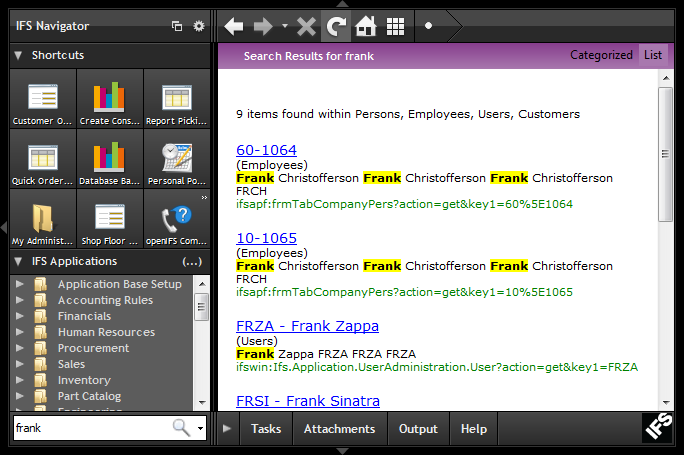
Use Enterprise Application Search (EAS) to quickly find the information you need. With EAS you are able to perform Google-like searches within IFS Applications by simply typing a text in the Search bar at the bottom of the Navigator panel. For example type a customer name, and EAS will present a list of objects containing the customer name sorted by relevance. Just click on the link you are interested in and a page related to the object will open with the information you need. IFS Security is built in which means that you can only see what you are allowed to see.
You specify which index locations (e.g. search domains) you want to use, for example Customers, Customer Orders, Suppliers, Purchase Orders etc. and this is stored in your user profile. Note that the index locations are usually configured, e.g. prepared to be used, by the System Administrator.
N/A
N/A
N/A
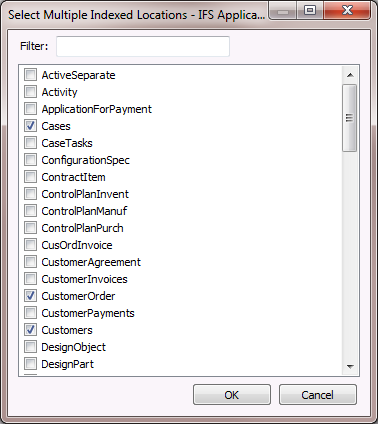
Application Search Results, Search Tips , Select Multiple Indexed Locations
Follow these steps to perform a search
Figure 1: The drop-down menu showing selected indexed locations
Note: The Summary text is very often needed to make a search result intuitive. However, having it enabled will also cause a performance hit during the search. If possible, try to avoid enabling the Summary text for better performance.
You can decide how you want the search result presented, either in a list as above or categorized as below. Categorized view means that the search result is sorted per index location.
When viewing an Enterprise Application Search result in the categorized list, the user can highlight several records within the same category and do the following:

Figure 5: Categorized Search result
When the results are in Categorized view you can add the search result to a
selection. Right Click on the list
of results and click Selection > Add to Selection to add the result items
to the selection and name the selection.
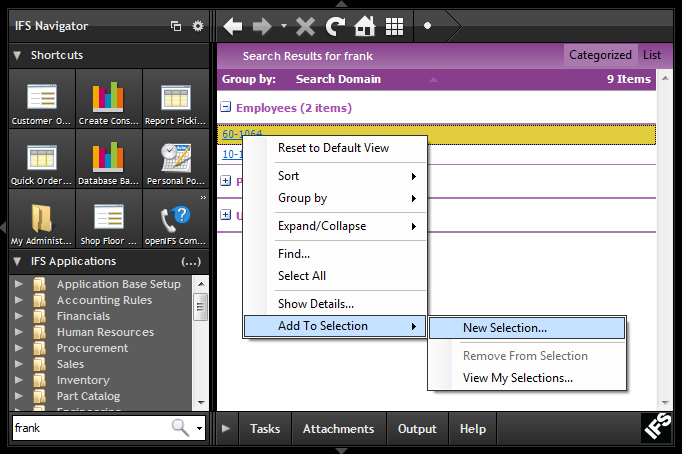
Figure 8: Adding search results to a selection
Note: The selection can only be created with the items of the same category.
So when searching in more than one search domain, and the result shows hits for
multiple domains (categories) Add to Selection
is only enabled for the items of the same type.
In the Enterprise Application Search drop-down list you can choose Options. This will open a dialog where you configure maximum number of hits, whether to include summary text or not.
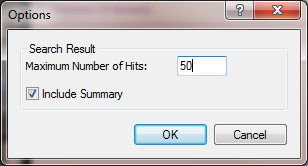
Figure 6: Options dialog box
A common web search syntax as follows can be used to query the application search.
| Syntax | Meaning of Query |
| saab* | words starting with saab |
| saab volvo | either saab or volvo |
| +saab volvo | records including saab, and records including volvo are ranked higher |
| saab -volvo | records including saab, but not including volvo |
| +saab +volvo | records including both saab and volvo |
| identity:alain | records that has alain in the identity field |
| "This is a phrase" | match the exact phrase field |
Table 1: Search syntax and meanings
A search tip related to the selected Indexed Location(s) are displayed if you select Search Tips menu item in Enterprise Application Search drop-down list.
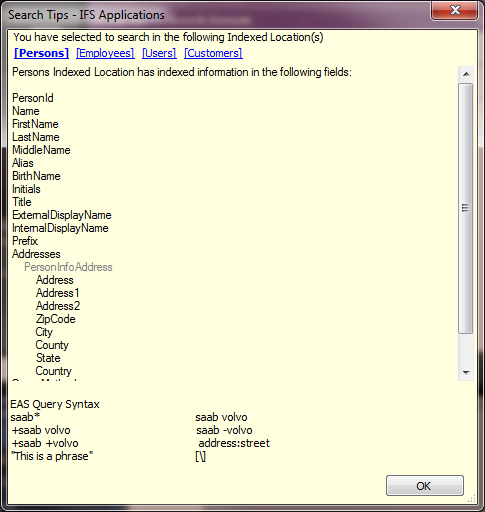
Figure 7: Search Tips
Highlight more than one object/row within the same category in the search
result or click on the category header to highlight all rows. Right click and click
"Show Details...". All the objects connected to the object are presented
in detail pages.