Information Cards can be used to view additional information in IFS Applications pages. Using Information Cards make information more accessible and can reduce the number of mouse clicks it takes to find the information you need. For example, on the Customer Order page you can create an information card with Delivery Terms, Payment Terms or any other information related to customer order. When viewing the Information card you don't need to go to tabs or other pages to find it.
When configuring an Information Card you choose from a predefined set of fields, define the order of the information and add labels and empty rows to enhance the layout. It's usually the System Administrator who makes this initial configuration, predefines the fields, this is described in the Technical Documentation.
You must have the permission to Configure Information Cards.
Information Card configurations are saved in the user profile.
N/A
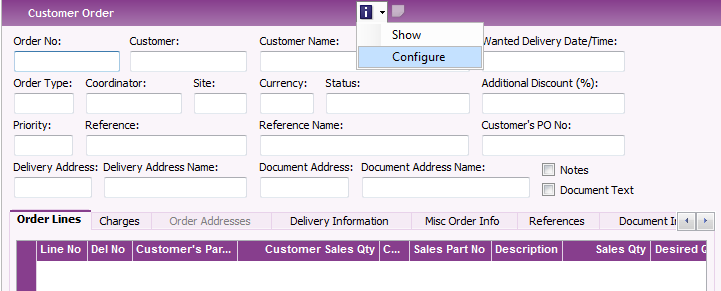
Open an IFS Application detailed page, Information Cards are not available in table/overview pages. The Information Card button in the toolbar is enabled if the page is prepared to use Information Cards. Click on the drop-down list by the Information Card button and select Configure from the context menu.
Figure 1. Information Card Context Menu
The Personalize Information Card dialog is displayed. The example below shows the dialog from the Customer Order page where the System Administrator has predefined a number of fields.
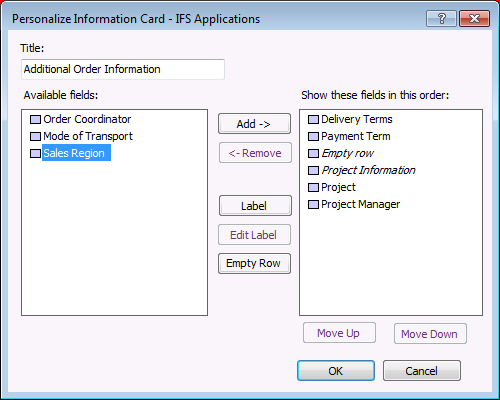
Figure 2. Example Personalize Information Card dialog
Do the following to configure an Information Card:
The Information Card will now be displayed on the page. See example below:
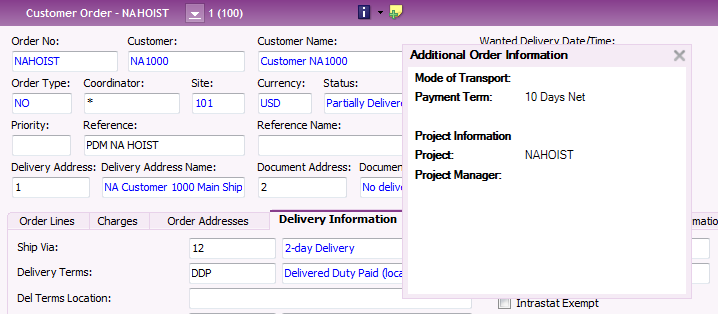
Figure 3. Information Card example Customer Order page