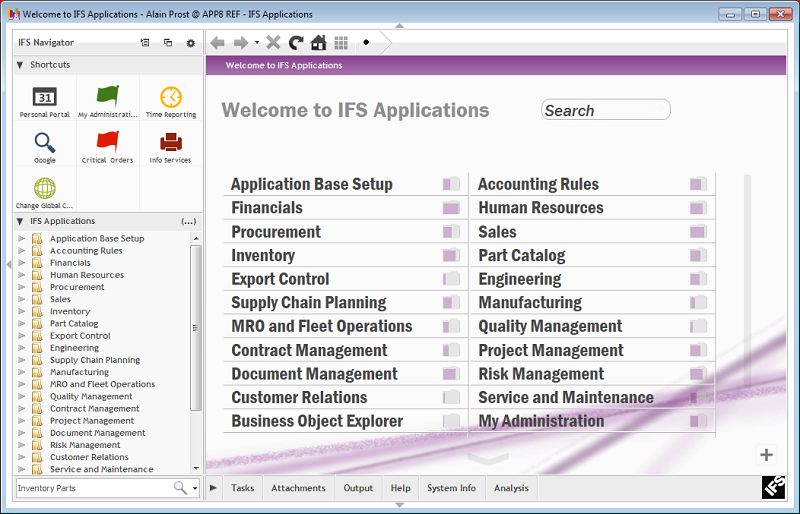
IFS Enterprise Explorer is the user interface for IFS Applications. It is started like a web browser and displays the IFS Applications forms in pages. It has several navigation options which you use to explore IFS Applications and find the pages and functions you want to work with.
This article describes the user interface IFS Enterprise Explorer. There are a number of functions that are common across all of the IFS Applications pages, and these are described in this and related articles.
Figure 1: IFS Enterprise Explorer User Interface
There are a number of color themes to choose from. You change this via Application Options, read more about Application Options
IFS Enterprise Explorer is divided into panes which include different functions:
- The Shortcut panel contains shortcuts which give quick access to pages and tools you want to work with on a frequent basis. Read more about Using Shortcuts.
- You can choose if you want to display a Photo Clock or the IFS Applications Navigator. Read more about Photo Clock/Navigator. The Navigator is used to navigate in IFS Applications, read more about all navigation possibilities in Navigating
- The Application Search bar is used to perform a "google-like" free text search within IFS Applications. Read more about Application Search.
- Tasks. Shows all your tasks, read more about Using Tasks.
- Output. This is where you configure your Output Channels, read more about Configure Output Channels.
- Attachments. This is where you view attachments, e.g. documents, etc, connected to the object you are currently working with. Read more about Using Attachments
- Help. This is where you can access the IFS Online Documentation and view field help. Read more about Using Help.
The Explorer Toolbar contains icons you use to navigate in IFS Applications, e.g. Back/Forward, Home etc. Read more about Using the Explorer Toolbar.
The Navigation Toolbar/Breadcrumbs is one of several navigation options, read more about Using Breadcrumbs.
The Work Area, 3 in figure 2 below, is where you work with pages, IFS Application pages and other pages. Usually you work with one page at a time and you use Recent Screens or the Back/Forward buttons on the Explorer Toolbar to jump between the pages you are working with. If you need more than one page open you open it in a new window, read more about Working in Several Windows.
By using Toggle Switches or F11 you can hide/unhide the panes to expand/collapse the work area, read more about Showing and hiding user interface elements
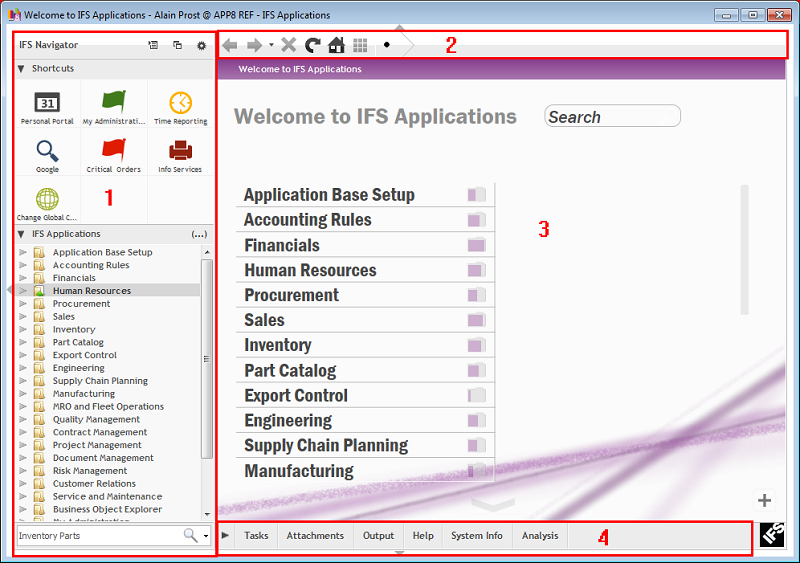
Figure 2: Areas in IFS Enterprise Explorer
From the Menu Bar you can reach different functions/settings. The Menu Bar is hidden by default, make it available by pressing the Alt key and it will be visible above the Navigator pane. The functions/settings in the Menu Bar are also available via the Context Menu button placed at the top of the Navigator pane.
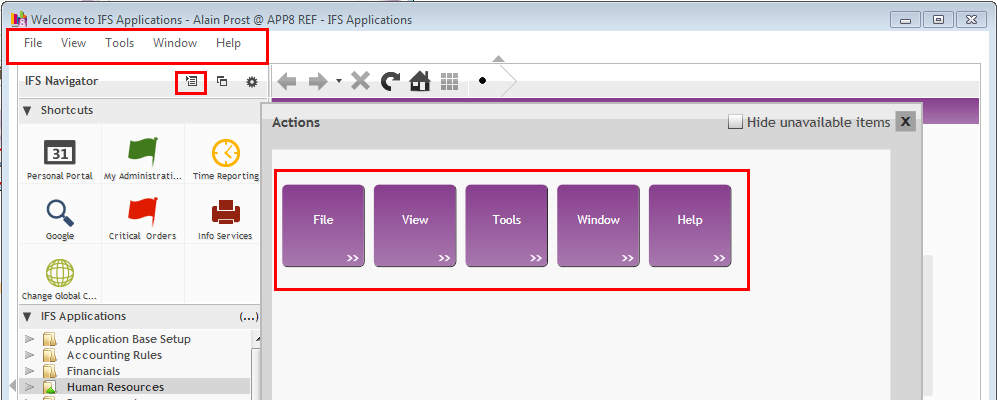
Figure 3: Menu Bar via Alt key and via Context Menu button
The functions/settings in the Menu Bar are organized in File, View, Tools, Window and Help.
The File menu provides access to different actions you use when working in an IFS Application page. The actions are enabled/disabled depending on what you are currently working with. E.g. Save is enabled when you have made data changes. You can also reach these actions from the Page toolbar and by using function keys. The File Menu also includes other type of actions such as change password and exit from the Applications.
The File menu includes the following actions:
- Populate: Populates the current page with all objects. Note that if there are many records the population might take a long time.
- Search: Opens the Search dialog where you enter search conditions to find the information you need. Read more about Using Search.
- Search in Context...: Opens Search dialog depending on where the cursor is focused. E.g. if you are working in a master/detail page and if the focus is on the detail part this will then open the Search dialog box for detail part.
- Save: Saves your changes in the database.
- Save as Draft...: Saves your changes as a draft. Read more about Using Drafts.
- Drafts...: Opens the Draft dialog where you can see the drafts you have created for current page. Read more about Using Drafts.
- Save as Template: Saves your changes as a template. Read more about Using Templates.
- New: Prepares the current page for entry of a new record.
- Duplicate: Creates a new record copied from current record.
- New From Template: Prepares the current page for entry of a new record with values fetched from chosen template. Read more about Using Templates.
- Delete: Prepares the current record to be deleted. Click Save button or chose Save from the Menu to save the changes in the database.
- List of Values...: Shows a list of valid values for current field. This is available for fields that are connected to basic data. Read more about List of Values.
- Zoom...: Opens up the basic data page connected to the current field. E.g. when entering a customer order and you want to change or create customer basic data, use Zoom in the Customer No field and the Customer basic data page will open in a new window.
- Send To: Includes two options, Send to Colleague and Send to Mail Recipient. Read more about Using Send to
- Close: Closes the active window. Note: This command does not close or exit the application, but If the active window is the only window, the application will be closed.
- Switch User (Restart): Allows you to log on to IFS Applications as a different user. The current session will be closed and the Login dialog will be displayed again. Read more about Switch User.
- Change Password: Allows you to change password. The Change Password dialog is displayed where you enter your old password and the new password. IFS Applications is restarted and you login using the new password.
- Exit: Closes down IFS Applications and all open windows. If you have unsaved changes, you are asked to save before exiting.
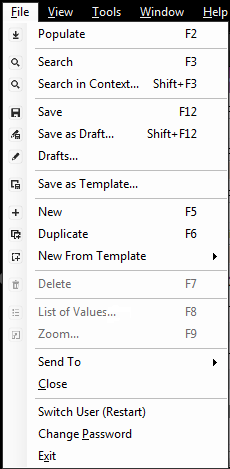
Figure 4. File menu
The View menu provides access to different settings, how to display panels etc. Most of these setting can also be controlled by keyboard shortcuts/function keys. It includes the following:
- Menu Bar: Shows/hides the Menu Bar.
- Address Bar: Shows/hides the Address bar. The Address bar displays the address of the current page, e.g. IFS Applications page or any web page.
- Navigator Pane: Shows/hides the Navigator Pane
- Top Pane: Shows/hides the Top Pane
- Context Pane: Shows/hides the Context panel
- Context Panes: Shows a drop-down list with all available Context panels. Select which panel to open.
- Go To: Provides options to go back/forward between pages, to the Home page and to Recent Screens. It also shows a list of pages you have worked with and you can select one of those pages to open it.
- Abort: Terminates current server activity. E.g. if you have populated a page by mistake or it takes too long you can terminate the population.
- Refresh: Refreshes the data on current page. This is useful when you want to see the latest updated data, e.g., you have had the page open for some time and maybe a colleague has made changes to the data.
- Next Block: Moves to the next table or tab. Complement to the tab key to move in or out of a child table.
- Record History: Opens the History Log window showing the update history for the current object.
- Maximize Work Area: Hides Top, Context and Navigator Panes.
- Full Screen: Closes all panes, e.g. expands the work area to use the complete window area. Select Full Screen again to show the panels again.
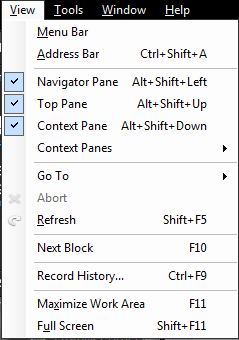
Figure 5: View Menu
The Tools menu provides access to the Application Options dialog and to the Debug Console.
- Options: Opens the Application Options dialog where you can change the applications appearance and behavior. Read more about Applications Options.
- Debug Console...: Opens the debug console. This is an analysis tool assisting developers and support teams to debug IFS Enterprise Explorer. Read more in the Technical Documentation.
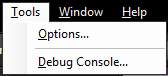
Figure 6: The Tools menu.
The Window menu contains different options to arrange the windows you currently have open in your session. It includes the following:
- New Window: Opens a new IFS Enterprise Explorer window
- Tile Horizontal: Organizes all active windows in a tiled horizontal format.
- Tile Vertical: Organizes all active windows in a tiled vertical format.
- Cascade: Organizes all active windows on top of each other.
- Minimize All: Minimizes all open IFS Enterprise Explorer windows.
- Restore All: Restores all minimized windows to their previous size and position.
- Close Other Windows: Closes all Enterprise Explorer windows except the current window.
At the bottom of the list all currently open windows are displayed with the page name. Select a window to switch to it.
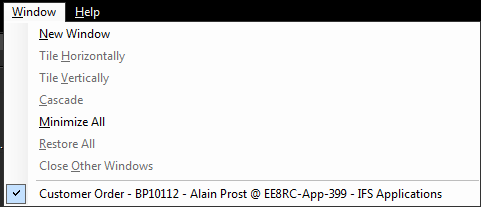
Figure 8:The Window menu.
The Help menu provides access to the different type of help available for IFS Applications. Note that some options are also available via shortcut keys/function keys. Read more about Using Help in IFS Enterprise Explorer.
The Help menu includes the following:
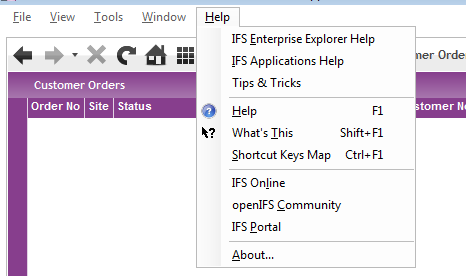
Figure 9: The Help Menu
You can choose if you want to display a photo clock or if you want to display the IFS Applications navigator. Switch between the two by clicking on the drop-down arrow.
Note that if you click the Camera button you can change the photo. It will open your file browser where you can select an image from your computer or network
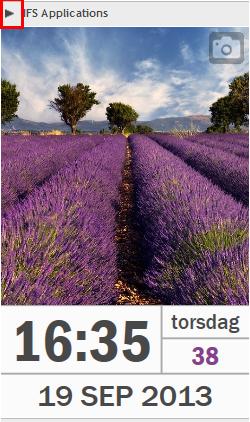
Figure 10: IFS Clock
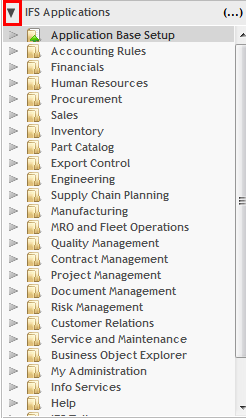
Figure 11. IFS Navigator
When working in an IFS Applications page different actions/functions are available in the page tool bar, e.g. Populate, Search, Save, New, Delete, List of Values, Zoom Hover over the button to see the function it will execute. Read more about Using Page Toolbar
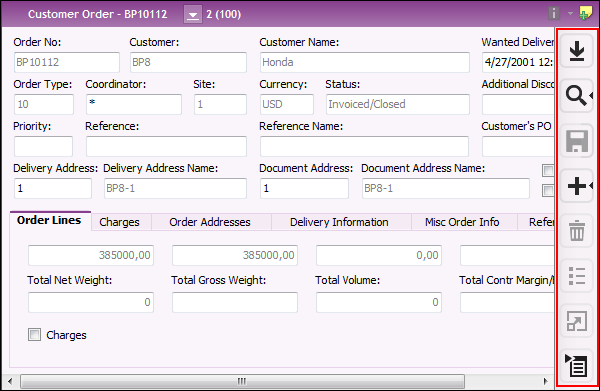
Figure 12: Page Toolbar
Many actions and functions can be performed by using shortcut keys/function keys instead of the mouse. The following are available:
|
Shortcut Key |
Action |
|---|---|
| F1 | Help |
| F2 | Populate |
| F3 | Search |
| F5 | New |
| F6 | Duplicate |
| F7 | Delete |
| F8 | List of Values... |
| F9 | Zoom... |
| F10 | Next Block |
| F11 | Maximize Work Area |
| F12 | Save |
| Shift + F1 | What's This |
| Shift + F3 | Search in Context... |
| Shift + F5 | Refresh |
| Shift + F10 | Context Menu |
| Shift + F11 | Full Screen |
| Shift + F12 | Save as Draft... |
| Ctrl + Space | Recent Screens |
| Ctrl +Up | Select Previous Record |
| Ctrl + Down | Select Next Record |
| Ctrl + C | Copy |
| Ctrl + S | Save |
| Ctrl + V | Paste |
| Ctrl + X | Cut |
| Ctrl + Z | Undo |
| Ctrl + 1 | Tasks |
| Ctrl + 2 | Attachments |
| Ctrl + 3 | Output |
| Ctrl + 4 | Help |
| Ctrl + F1 | Shortcut Keys Map |
| Ctrl + F3 | Enterprise Application Search |
| Ctrl + F9 | Record History... |
| Ctrl + Shift + A | Address Bar |
| Ctrl + Shift + F | Navigator Filter |
| Ctrl + Shift + R | Record Selector |
| Alt | Show/Hide Menu Bar |
| Alt + Home | Home |
| Alt + Left | Back |
| Alt + Right | Forwards |
| Alt + Shift + Left | Navigator Pane |
| Alt + Shift + Up | Top Pane |
| Alt + Shift + Down | Context Pane |
| Shift + Click (on Navigator Node, Shortcut or Context Menu option) |
Opens the selected page in a new window |
A tool tip is a short description of what a toolbar button does. The tool tip appears when you hover on e.g. a button, the tip is displayed in a small box next to the cursor.
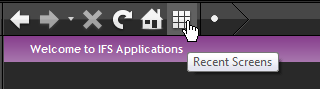
Figure 17: Tool Tip